Showing posts with label DIY. Show all posts

Friday, January 25, 2013

DIY Friday: Rainbow Flowers

Here we are again! Thank Heavens its Friday everyone! As we are a mere 6 days away from the start of February, I seem to be starting cabin fever a bit early this year. I have found myself perusing the inter-web for the pinochle of spring perfection: Flowers. As we are all well aware, flowers can make a wedding celebration. From bouquets and centerpieces to corsages and flower girls petals, flowers can brighten any celebration. For our DIY project this week, I came across a hands on (obviously) easy and stunning DIY for us to work on!

All steps and pictures brought to us by ColorMeKate and her fabulous designs, I couldn't help but share her work!

RAINBOW FLOWERS

Step 1: Find any pretty white flower


Step 2: With a sharp knife and a steady hand, split the end of the flower's stem into four sections.


Step 3:  Put each section in a different cup of colored water.


Step 4: Wait....(cricket...cricket)

Step 5: TADAAAAA!!!!


How cool is that!!!!

Happy DIY-ing!

xoxo

Katherine


Friday, January 11, 2013

DIY Friday: Glass Decor!


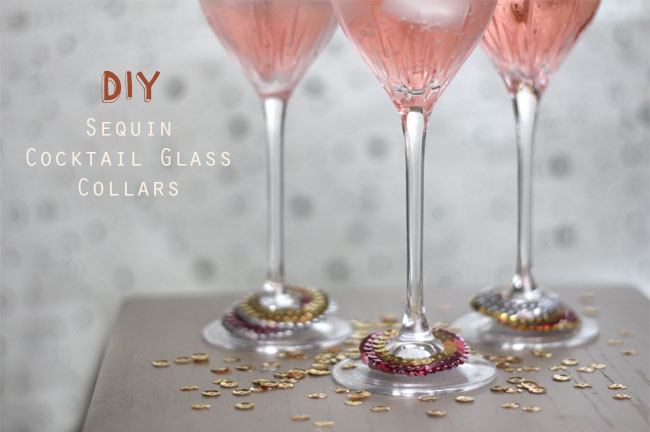
DIY Sequin Cocktail Glass Collars

DIY Sequin Glass Collars

Looking for some sparkle to add to your holiday parties? Check out this fun DIY for your cocktails from GreenWeddingShoes.com DIY contributor Christy of One Handspun Day!  Just as a reminder and to give credit where it is due, this DIY  was created by Christy of One Handspun Day exclusively for Green Wedding Shoes. Check out more of her designs at One Handspun Day
These cute and trendy collars would be decor enough for any shindig (maybe even a bachlorette party with a Vino theme!) but can also he helpful in differentiating your individual glass from your friends! 

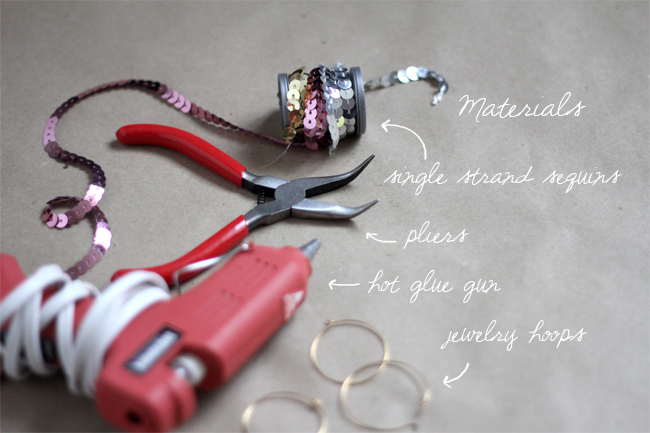
DIY Cocktail Collar - Materials

Materials:
• ¼” Single Strand Sequin Trim
• Jewelry Hoops (approximately 1.5” in diameter)
• Hot Glue Gun
• Pliers
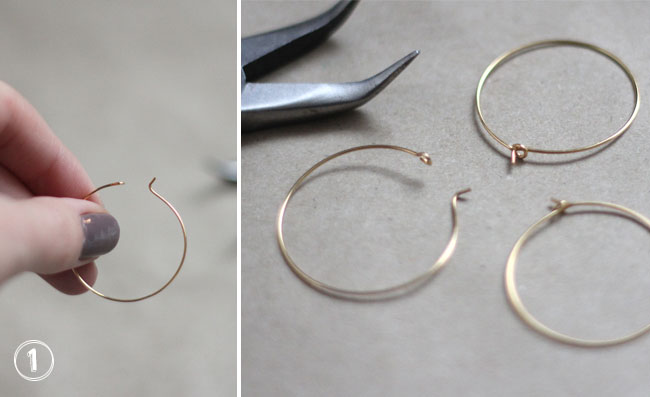
step_one_collars

Step One: Bend the hoop
Use your pliers to bend the end (non loop side) of your hoop at a 90 degree angle. You should be able to gently push it through the center of the loop on the other side to create a clasp that holds the hoop closed.
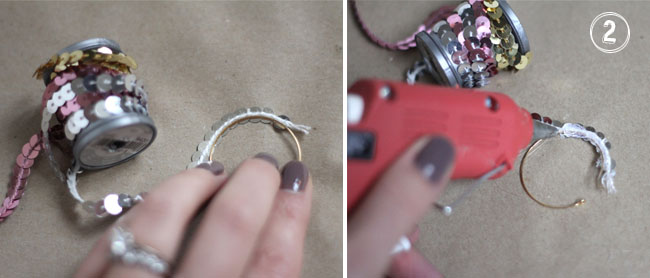
step_two_collars

Step Two: Align the sequins to the hoop
Next you want to place your sequin trim face down in front of you. Place the hoop on top and align the string of the sequin strand with the outer curve of the hoop. Use your hot glue gun to secure the strand to hoop, but leave an opening (approx. ½”) at the side with the clasp.
step_three_collars

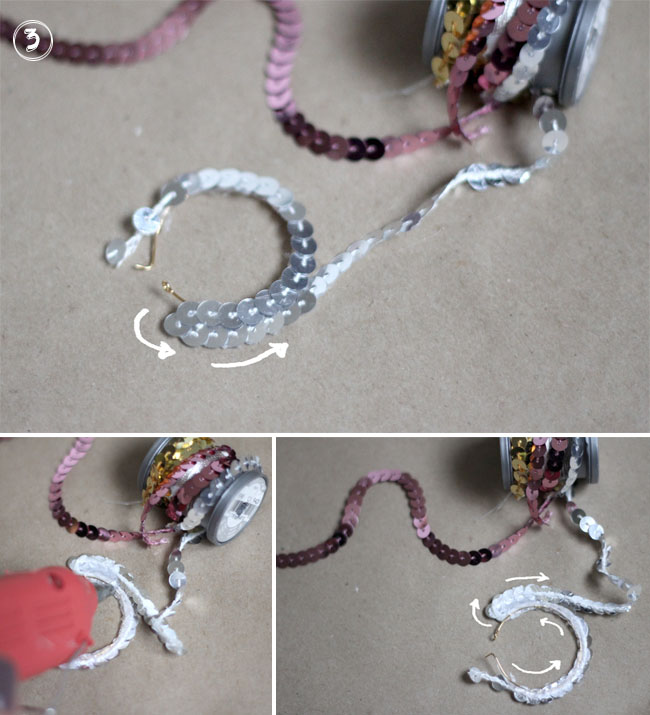
Step Three: Glue the sequins to the hoop
After you finish gluing the first row to the hoop, make a ‘u-turn’ with your strand to create the second row of sequins. The second row should be placed on top of the first row with the edges of the sequins aligned snuggly against the string of the first row. Glue to keep the second row in place and repeat for the third row.
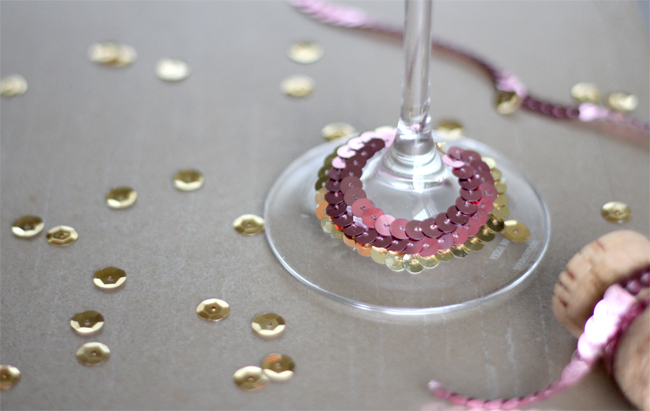
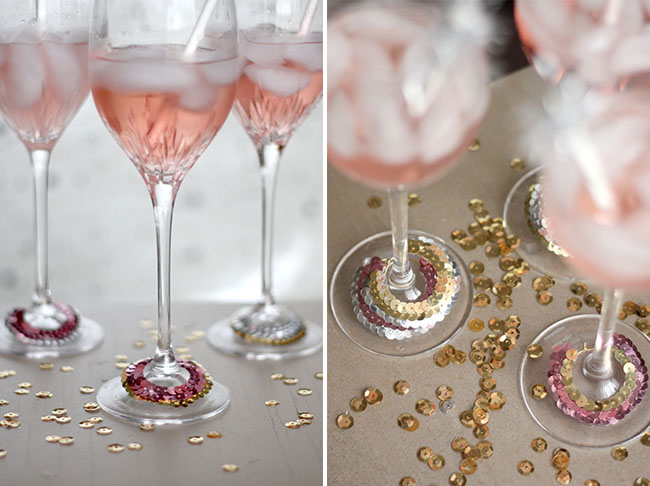
DIY Sequin Cocktail Glass Collars
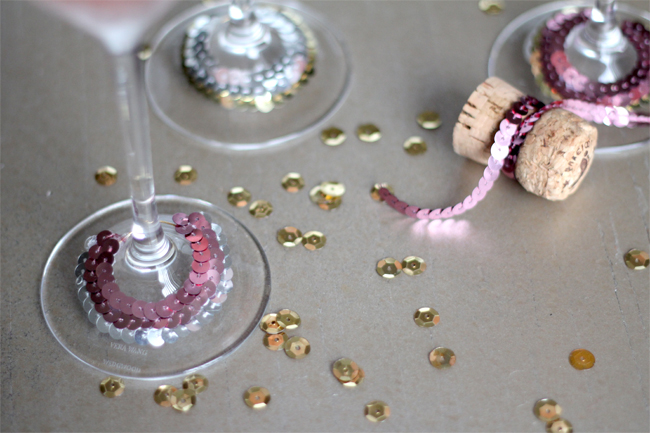
finished_collars
DIY Sequin Cocktail Glass Collars


Enjoy!!!

xoxo
Katherine

Friday, December 28, 2012

DIY Friday: Pinecones!


DIY: Pinecone Seating Card Holders

Pinecones are extremely in right now! why not use them for your winter wedding??? This DIY is so simple! Ask for assistance, or fear not for the manicure and do it yourself!


Thank you to our friends at ProjectWedding for this tutorial!


Materials Needed:

1. Mini Pinecones: $5 for a bag of 30 (Can be bought from a flower market or craft store)
2. Hacksaw: $9 If possible get one with small teeth.
3. Safety Glove: $5 to hold the Pinecone while you saw.
4. Cards for the names

Thank you to our friends at ProjectWedding for this tutorial!


Step One: Set each pine cone down on a flat surface to see how it stands up in order to decide the best place to cut it.

Step Two: Wearing the safety glove and using the hacksaw, cut a 3/4" slit down the middle of the pine cone.

Step Three: Place the name card in each slot, and you are done!

How cute are these!!!

xoxo

Katherine

Friday, December 21, 2012

DIY Friday: Wedding Invitation Ornament


DIY : Wedding Invitation Ornament

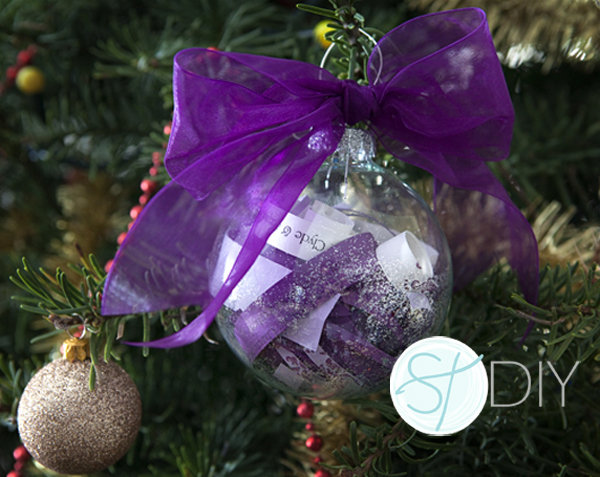
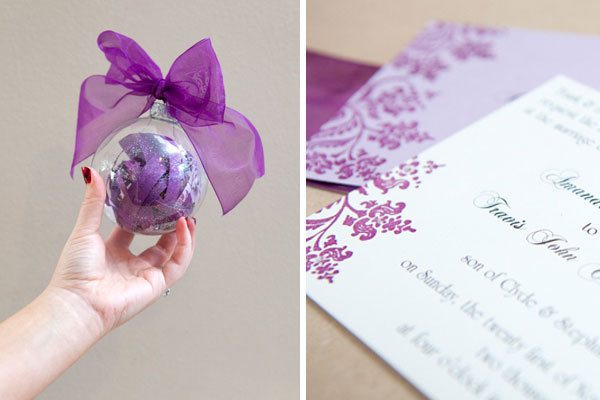
Why buy a generic ornament to mark your first wedded Christmas when you can create one that is truly unique to you? These Wedding Invitation Ornaments from our blogger friend Jen at SomethingTurquoise.com are quick, easy, and inexpensive to make; they'll showcase a couple's love for years to come. Grab a pair of scissors and start creating some holiday magic! Thank you to Bridalguide.com for posting such an amazing top! All of these photos are theirs via Mary Gillen of the-budget-guru's blog

Materials:

  • Wedding invitation
  • Large 4'' globe ornament
  • Your choice of glitter or paint (you can also use both)
  • Ribbon
  • Mod Podge
  • Scissors
  • Paper trimmer
  • Paint brush

​Option 1: Glitter-Glam Ornament
purple wedding invitation ornament

Step 1: Assemble The Paper Strips

  • Gather your invite card, RSVP card, and map card (if you have one). 
glam wedding invitation ornament
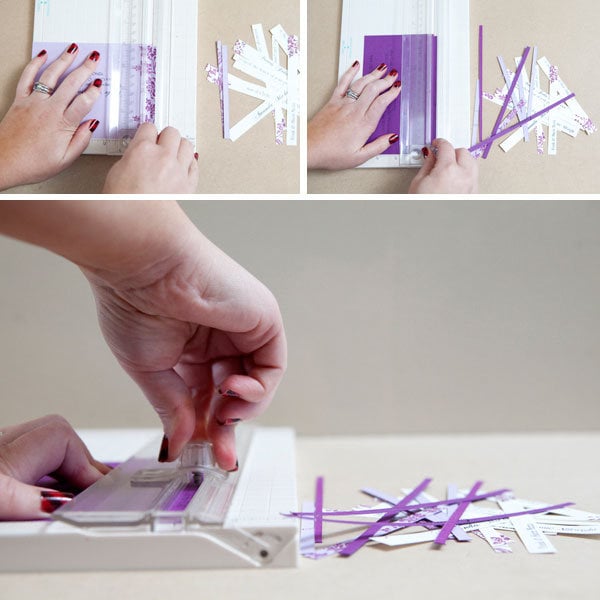
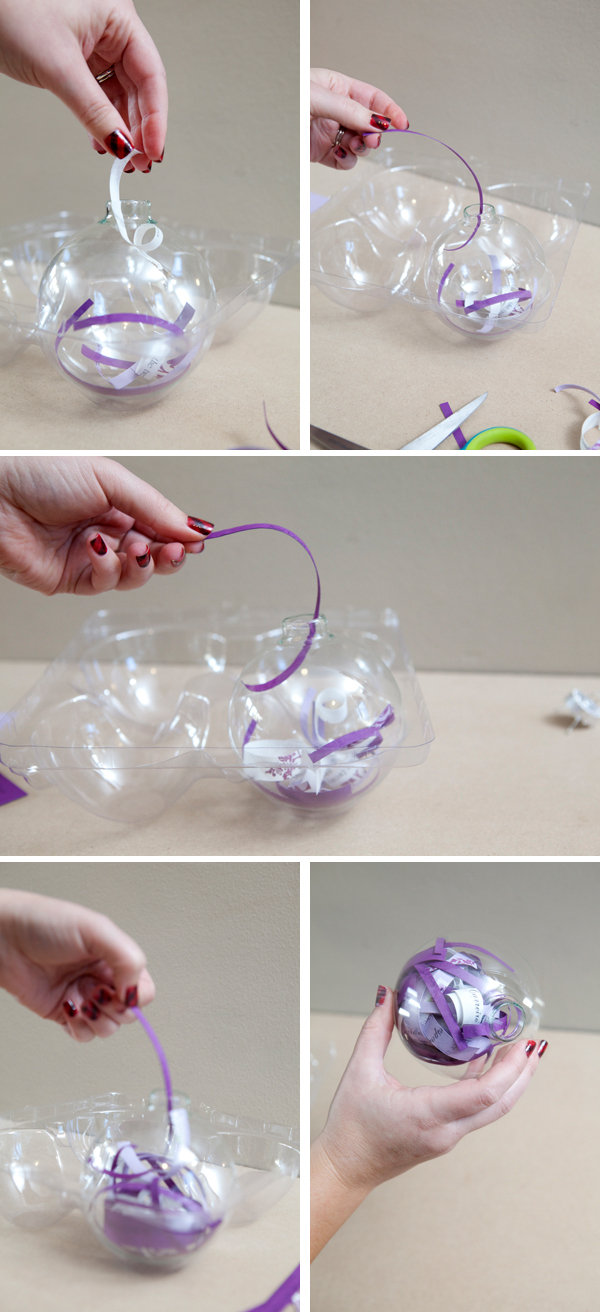
  • Use the paper trimmer to cut the invitation into thin strips of paper. Be careful not to slice through important words! Also, make sure that your strips are able to fit through the opening of your ornament.
cutting the strips of invitation
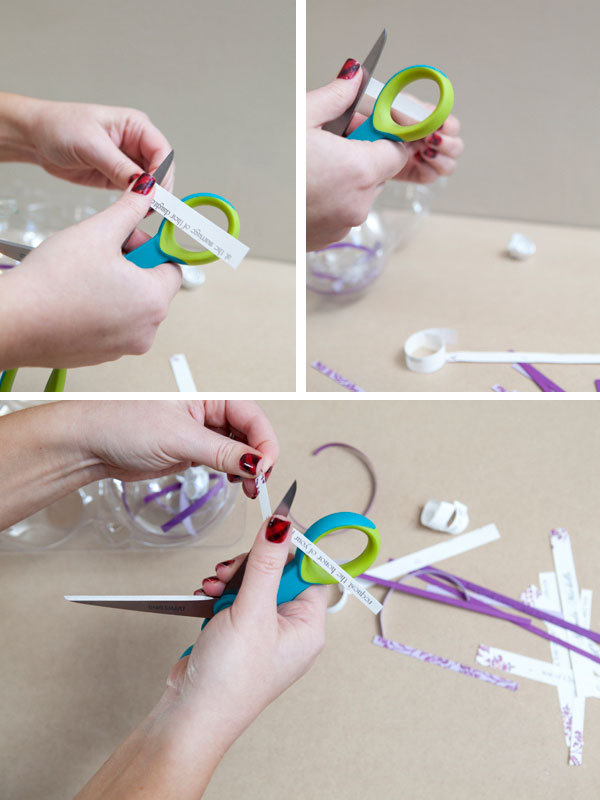
  • Next, run the paper strips over your scissors, just like you would to curl a ribbon. Some types of paper will curl much easier than others— wrap it into a curl shape as best as you can.
curl the strips of invitation with scissors
  • Then, piece by piece, insert each paper strip into your ornament. Alternate colors, so that the ornament is more eye-catching!
place strips inside the globe
  • Shake your ornament around to get the papers to mesh together (the ornament looks best when it's packed full of paper).

Step 2: Add Glitter

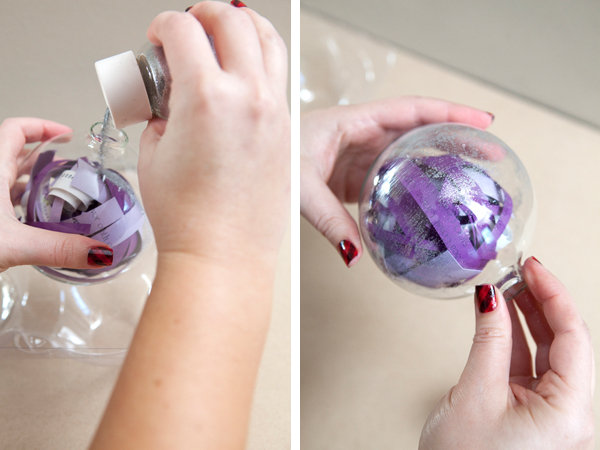
  • In this example, Jen added a little glitter to the inside of the globe for some extra sparkle.
adding glitter to the ornament
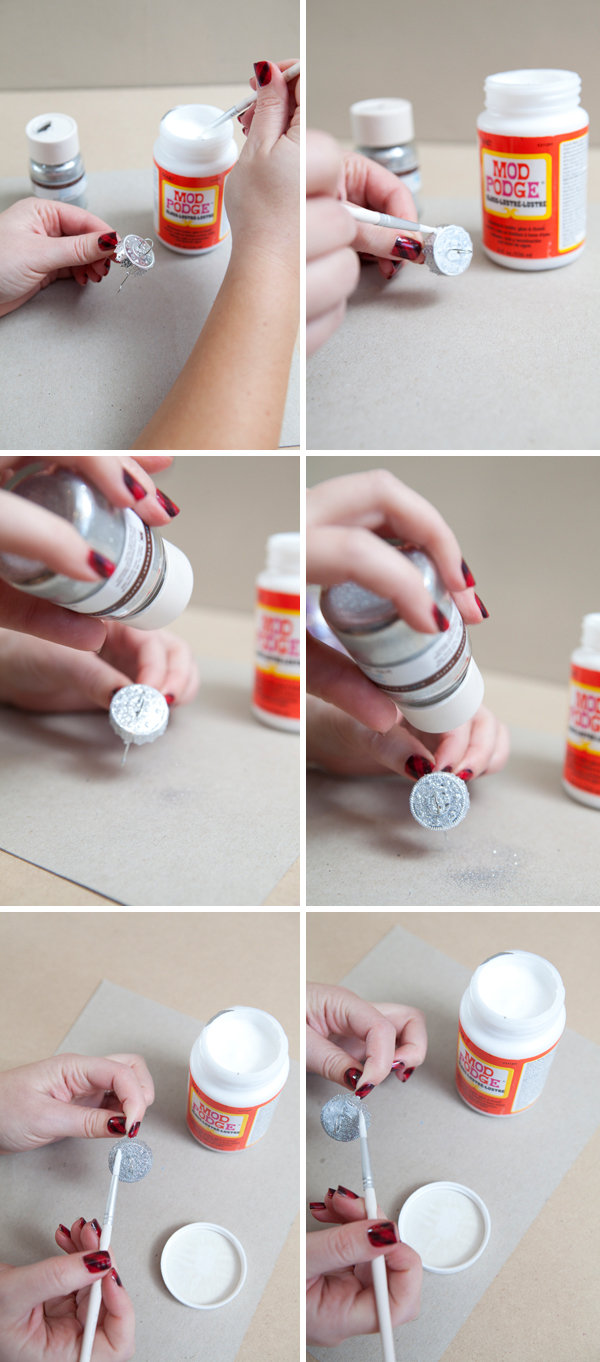
  • Next, it's time to decorate the silver top of the ornament. Layer it with Mod Podge, then cover with glitter. Once it's completely dry, add a second coat of Mod Podge to seal the glitter.
adding mod podge

Step 3: Put The Finishing Touches

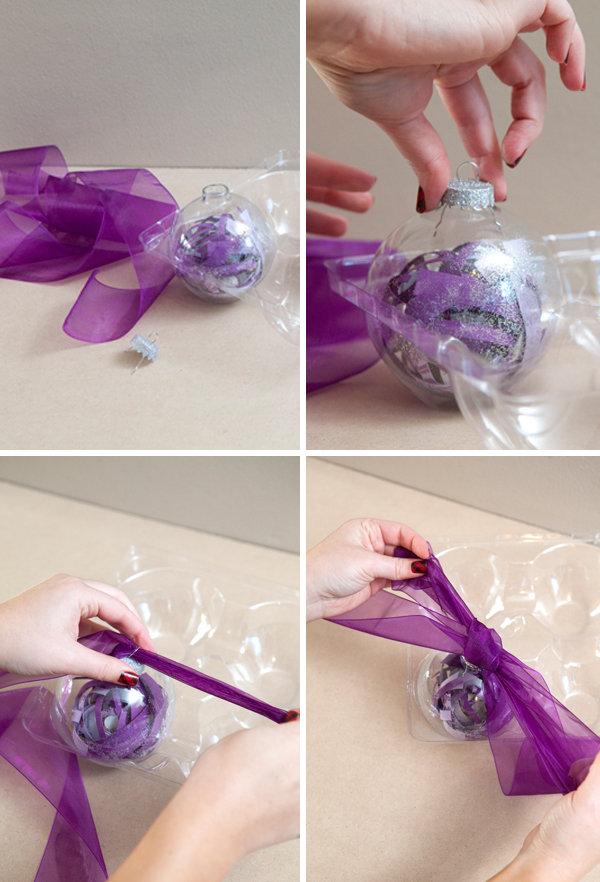
Finish by putting your glittery top in place and tying an oversized bow. There you have it, a fabulous addition to any tree!
put the top on the ornament \

Have fun everyone!!!

xoxo

Katherine

Friday, October 26, 2012

DIY: Rhinestone Garter

Oh My Stars and Garters!

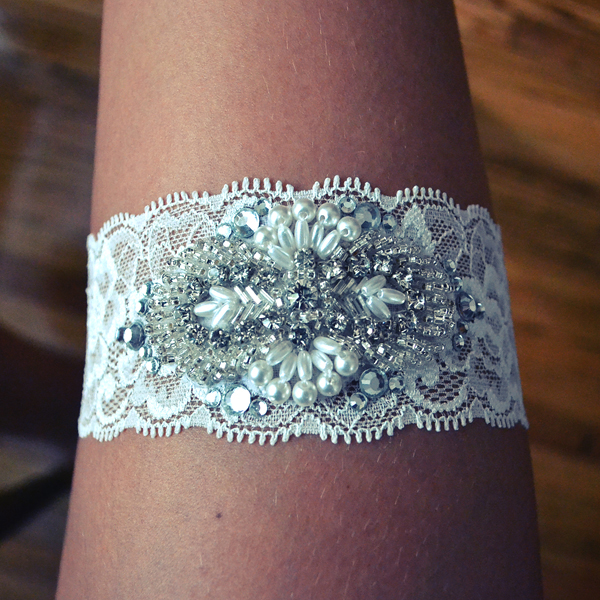
Are you the type of bride who thinks that using a DIY for your wedding day will just be too difficult to manage? Well here is what I have to say to that! There are tons of smaller projects that you can take on to add your personal stamp to the big day without giving up hours of your time...or sanity. Keeping in line with our trend of scheduling a DIY every Friday, This tutorial from Ren Ariel Sano, the artist and jewelry designer behind All The Good Girls Go To Heaven, takes just four easy steps that you can complete in about an hour! (Yes, I have made one myself!)  Designing and wearing your own garter — even if just your future husband sees it if you are shy showing off your sewing skills — makes your special wedding day that much more special. It really is THAT easy! 


Materials

  • Stretchy, lace ribbon (I found mine on bitsybands.com)
  • Rhinestone appliqué ($6 and up at shinetrim.com)
  • Needle and thread
  • Hot fix rhinestones and rhinestone setter or iron (optional)

Step 1: Cut The Lace

  • Make sure the lace you buy is stretchy so it won't fall down your leg.
  • Measure the lace before you cut — the final product can also be worn as a headband, so measure accordingly.


Step 2: Sew

  • Find the center point of the lace.
  • Sew on the appliqué. 
  • How about incorporating your something blue?

Step 3: Add Rhinestones

  • Arrange the hot fix rhinestones around the appliqué.
  • Once you finalize your design, set with an iron or rhinestone setter.

Step 4: Finish Up

  • Turn the lace inside out and sew together.

Take a look at the finished product! How cool is that! Yay you!


Happy Planning!

xoxo

Katherine

Thursday, October 18, 2012

DIY: Polka Dot Veil

DIY: Polka Dot Veil

Keeping in line with our new tradition of weekly DIY Projects, here is one for a Polka Dot Birdcage Veil! I came across this little project while visiting greenweddingshoes.com. They are one of my favorite hubs for inspirations, DIY, real weddings and engagement ideas!

 *ALL RIGHTS GO TO GREENWEDDINGSHOES.COM AND  ONEHANDSPUNDAY.COM*

DIY created by Christy of One Handspun Day exclusively for Green Wedding Shoes. Check out more of her designs at One Handspun Day! Finished veil photos thanks to S’Wonderful Photography.


Making your own veil is so easy to do and it’s a beautiful way to add something personal to your wedding ceremony. And if you are not exactly graceful with a needle and thread, this is one of the most forgiving projects you will find because messy stitches are hidden among the tulle and ruffles – plus we’ve incorporated sweet polka dots! Big thanks to our DIY contributor Christy of One Handspun Day for this sweet DIY.


Materials Needed:

• Tulle
• Thread & Needle
• Scissors
• Acrylic Paint
• Pencil (eraser end)
• Wax Paper


Step One: Stamp Dots onto Tulle

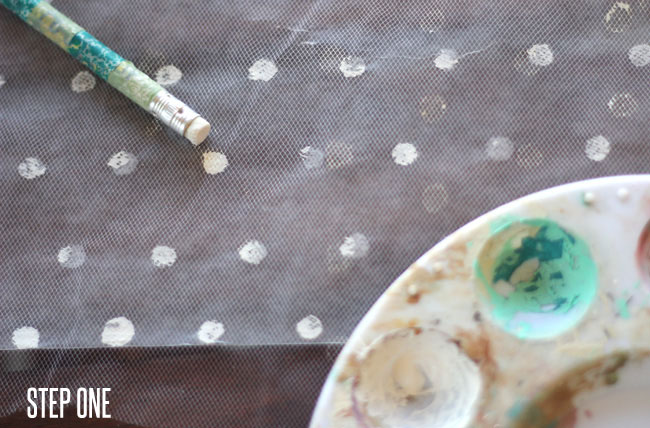
Cover your workstation with wax paper and tape the corners to secure. Spread your tulle over the wax paper and secure as well. Use the acrylic paint and eraser end of your pencil to stamp dots onto the tulle. I spaced my dots approximately 1 inch apart and staggered the rows half an inch (you can place a ruler below the area you are stamping if the thought of eyeballing it makes you queasy). After you stamp each dot, allow the tulle to lift up from the wax paper so the paint does not sit between the spaces of the tulle and dry into solid dots. You just want the paint to dry on the tulle itself so you can still see through fabric when you hold it up.


Step Two: Cut Tulle

Once you have finished covering the tulle in dots allow it to dry for at least 30 minutes. Then cut down to size (mine was approximately 12″ long and 24″ wide). I wanted to give mine a little bit more personality, so I added a scalloped edge to one of the long sides.


Step Three: Sew Veil onto Comb

Sew one of the long sides of the tulle using a running stitch (approximately ¼” space between stitches). Pull one end of the thread and push the tulle with your other hand to gather the fabric into a slight ruffle. Secure the end of the thread to keep the ruffle in place. Sew the ruffle onto your hair comb, creating pleats as needed, so the entire ruffle ends up fitting onto the comb by the time you reach the end. Tie off your thread and make sure it is secure.

Once your veil is finished you can add embellishments such as feathers, flowers, brooches or jewels to the comb so that it coordinates with the style of your dress!

Happy Planning!

xoxo

Katherine

Friday, October 12, 2012

DIY: Burlap Ring Pillow

Everyone is obsessed with DIY projects now! One of the easiest details to DIY is the classic ring pillow for the wedding bands. Each can be customized to the theme of the wedding itself and they aren't that difficult to create! I was scouring the web for a simple but fun ring pillow DIY design and came up with something better! I saw this DIY tutorial made as a collaboration between Blue Label vendor BurlapFabric.com and etsy vendor Emily Zych of whichgoose . It’s a burlap ring pillow that’s both supremely easy to make AND super cute!


*ALL RIGHTS GO TO EMILY ZYCH AND BURLAPFABRIC.COM*


For this project you will need:
-piece of burlap fabric or small burlap bag
-length of jute twine
-large plastic needle (big enough to string the twine)
-needle and thread
-pins
-iron
-scissors


Instructions:
1. Cut one large piece of burlap material about 9 x 13″ or a small burlap bag
2. Fold each edge over about 1/2″ and press with a iron (you can also pin into place if an iron is not handy)


3. Fold the entire piece in half long ways.
4. Sew along two of the open sides. Make sure to leave one side open.
5. Stuff your pillow with any sort of polyfill filling and sew remaining side closed.
6. String a piece of jute twine on a large needle.


7. Poke needle through middle of pillow, and back up again about 1″ apart.
8. Tie two ends together in a knot.
9. Finish up with a bow!


You can buy one of Emily’s ring pillows right here.


How cute are they!!!

Happy planning everyone!!!


xoxo

Katherine

Wednesday, June 6, 2012

Throw Away the Bouquet? NO WAY!

As most of you reading this blog well know, a wedding requires a lot of time and money in order to have the perfect day- included in that are the flowers. Brides, grooms, and event planners focus much of their attention on this portion of the wedding because flowers serve as the “pop” of color, they are the aroma to the room, they are the aesthetic aspect to a ceremony—in all, the flowers hold much importance. From centerpieces, to boutonnières, to a bride’s bouquet, so much is spent in picking the “perfect” arrangements.
So the question now begs itself, what is there to do with these flowers after the ceremony and reception are over? I’m here to tell you that no matter what people may tell you, your bridal bouquet holds a great significance and can forever be a memory of your wedding day- if you just don’t throw away the bouquet. 
Here are some fun and fabulous ways to go about saving your bridal bouquet to cherish for years to come.