DIY : Wedding Invitation Ornament
Why buy a generic ornament to mark your first wedded Christmas when you can create one that is truly unique to you? These Wedding Invitation Ornaments from our blogger friend Jen at SomethingTurquoise.com are quick, easy, and inexpensive to make; they'll showcase a couple's love for years to come. Grab a pair of scissors and start creating some holiday magic! Thank you to Bridalguide.com for posting such an amazing top! All of these photos are theirs via Mary Gillen of the-budget-guru's blog!
Materials:
- Wedding invitation
- Large 4'' globe ornament
- Your choice of glitter or paint (you can also use both)
- Ribbon
- Mod Podge
- Scissors
- Paper trimmer
- Paint brush
Option 1: Glitter-Glam Ornament
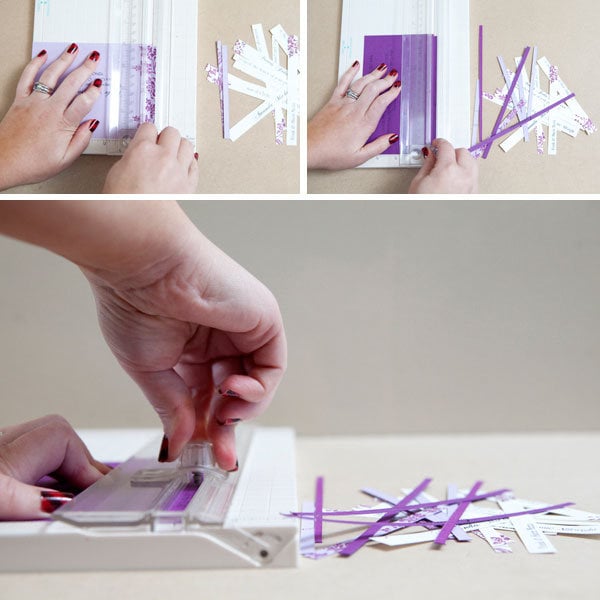
Step 1: Assemble The Paper Strips
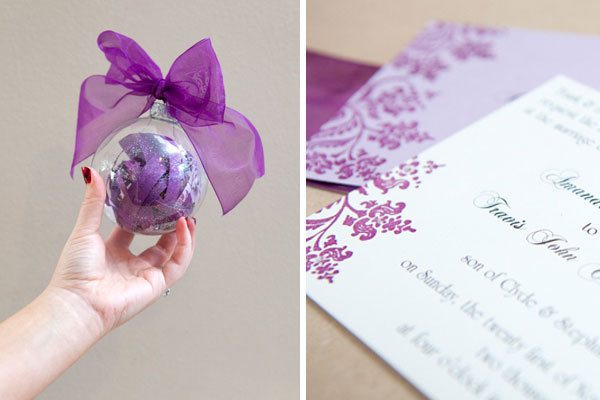
- Gather your invite card, RSVP card, and map card (if you have one).
- Use the paper trimmer to cut the invitation into thin strips of paper. Be careful not to slice through important words! Also, make sure that your strips are able to fit through the opening of your ornament.
- Next, run the paper strips over your scissors, just like you would to curl a ribbon. Some types of paper will curl much easier than others— wrap it into a curl shape as best as you can.
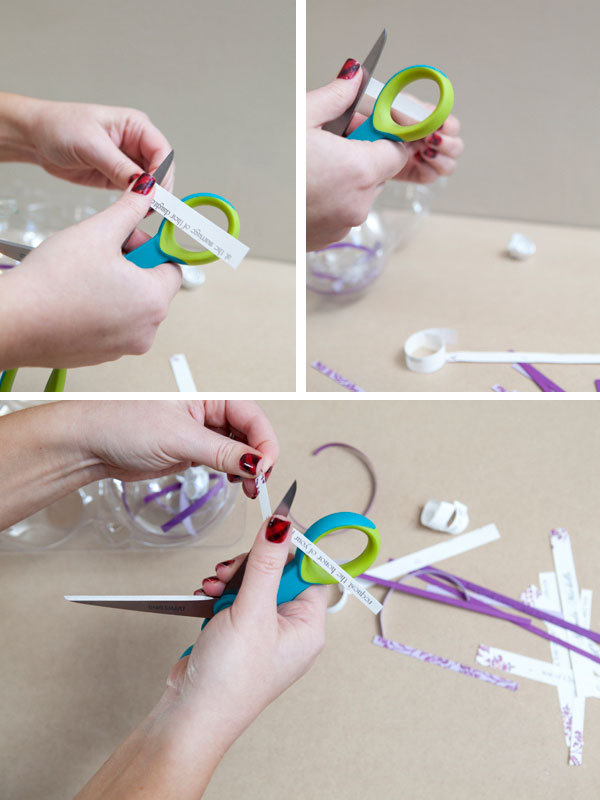
- Then, piece by piece, insert each paper strip into your ornament. Alternate colors, so that the ornament is more eye-catching!
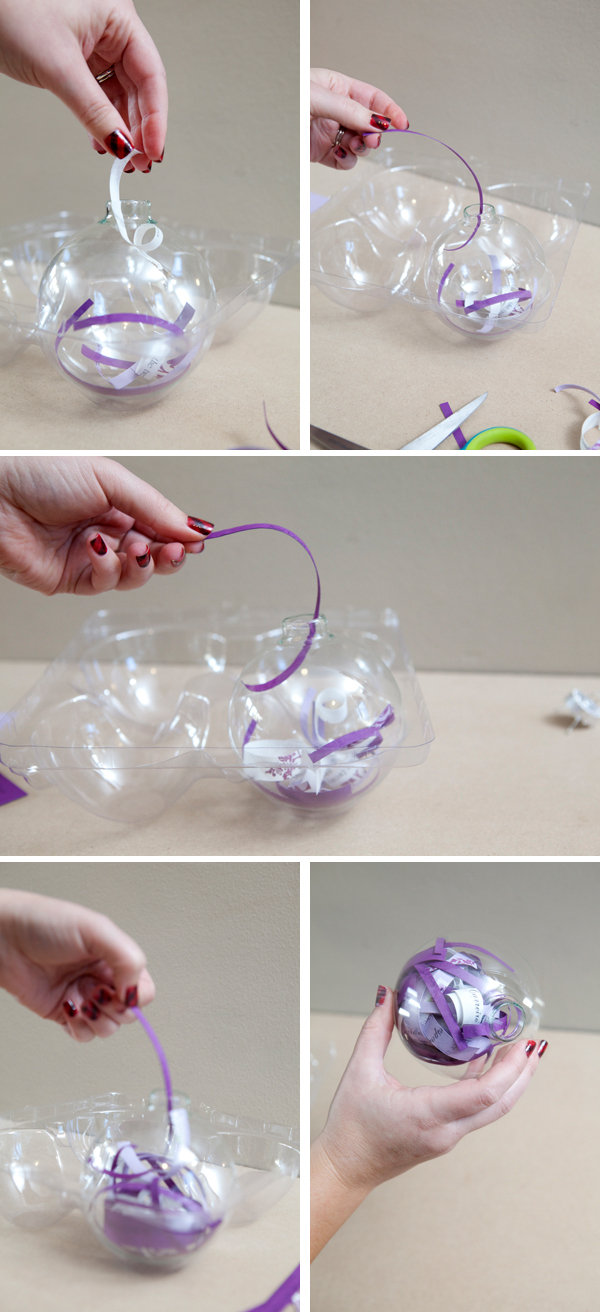
- Shake your ornament around to get the papers to mesh together (the ornament looks best when it's packed full of paper).
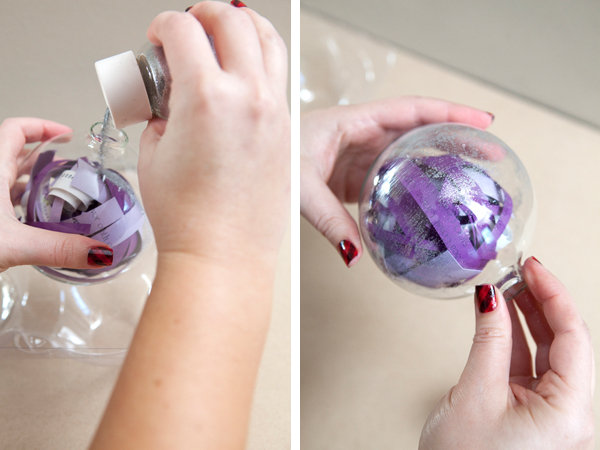
Step 2: Add Glitter
- In this example, Jen added a little glitter to the inside of the globe for some extra sparkle.
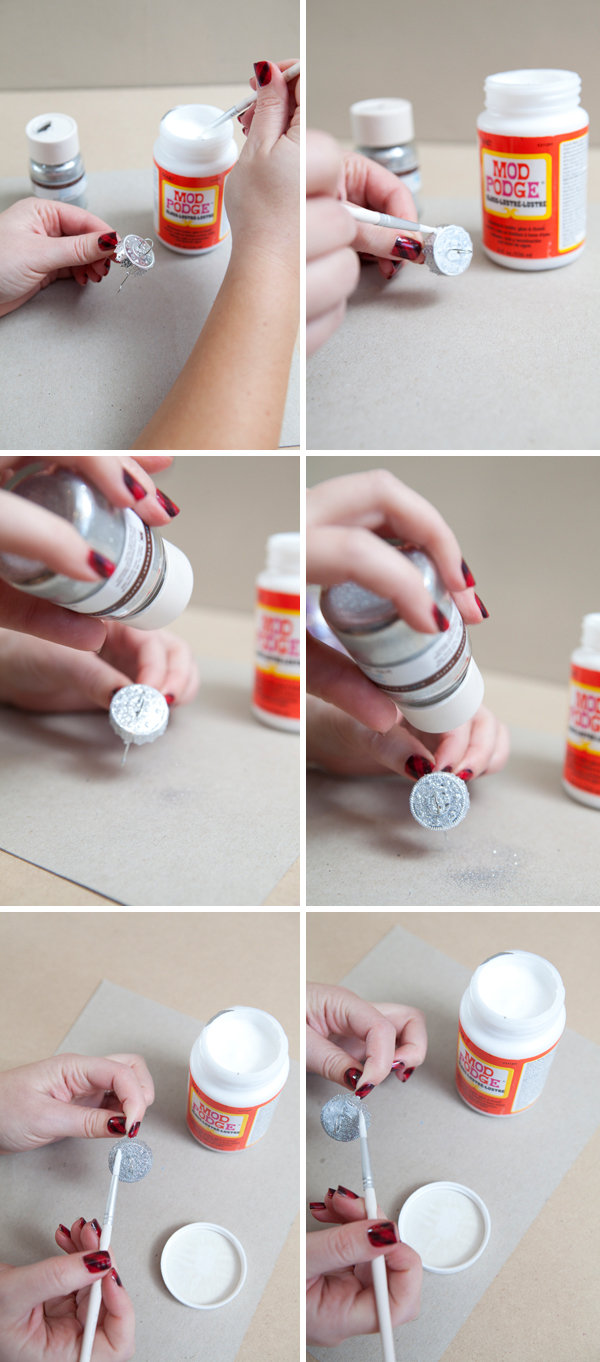
- Next, it's time to decorate the silver top of the ornament. Layer it with Mod Podge, then cover with glitter. Once it's completely dry, add a second coat of Mod Podge to seal the glitter.
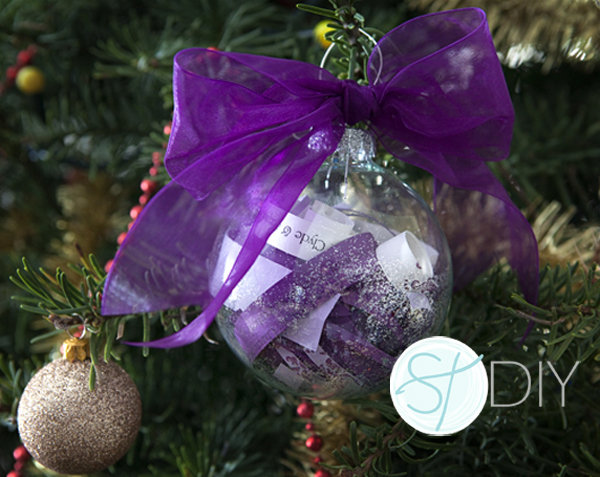
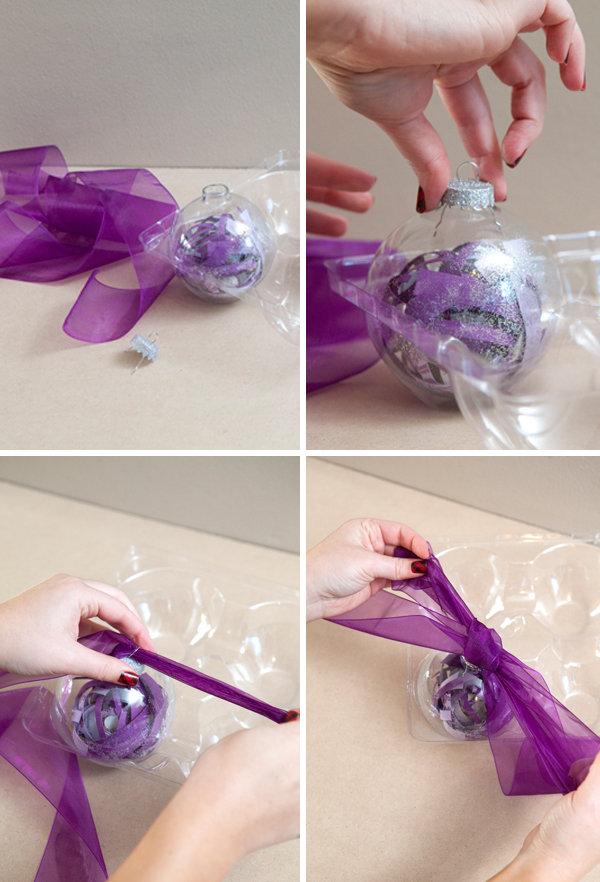
Step 3: Put The Finishing Touches
Finish by putting your glittery top in place and tying an oversized bow. There you have it, a fabulous addition to any tree!
 \
\Have fun everyone!!!
xoxo
Katherine
No comments:
Post a Comment