Oh My Stars and Garters!
Are you the type of bride who thinks that using a DIY for your wedding day will just be too difficult to manage? Well here is what I have to say to that! There are tons of smaller projects that you can take on to add your personal stamp to the big day without giving up hours of your time...or sanity. Keeping in line with our trend of scheduling a DIY every Friday, This tutorial from Ren Ariel Sano, the artist and jewelry designer behind All The Good Girls Go To Heaven, takes just four easy steps that you can complete in about an hour! (Yes, I have made one myself!) Designing and wearing your own garter — even if just your future husband sees it if you are shy showing off your sewing skills — makes your special wedding day that much more special. It really is THAT easy!

Materials
- Stretchy, lace ribbon (I found mine on bitsybands.com)
- Rhinestone appliqué ($6 and up at shinetrim.com)
- Needle and thread
- Hot fix rhinestones and rhinestone setter or iron (optional)

Step 1: Cut The Lace
- Make sure the lace you buy is stretchy so it won't fall down your leg.
- Measure the lace before you cut — the final product can also be worn as a headband, so measure accordingly.

Step 2: Sew
- Find the center point of the lace.
- Sew on the appliqué.
- How about incorporating your something blue?

Step 3: Add Rhinestones
- Arrange the hot fix rhinestones around the appliqué.
- Once you finalize your design, set with an iron or rhinestone setter.

Step 4: Finish Up
- Turn the lace inside out and sew together.

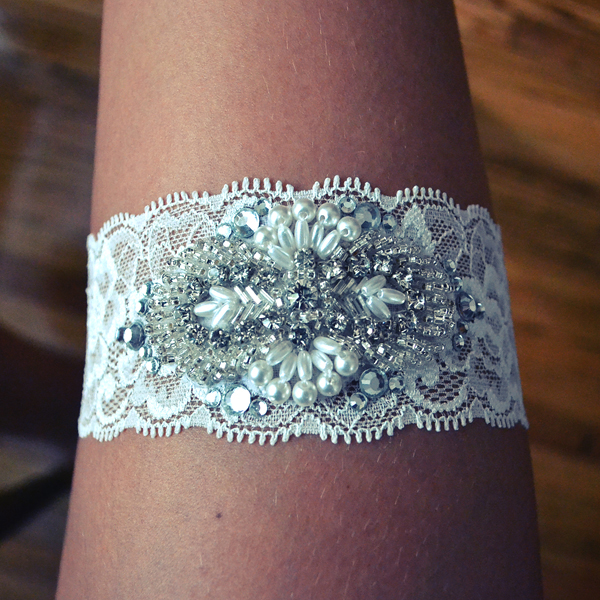
Take a look at the finished product! How cool is that! Yay you!
Happy Planning!
xoxo
Katherine
No comments:
Post a Comment